|
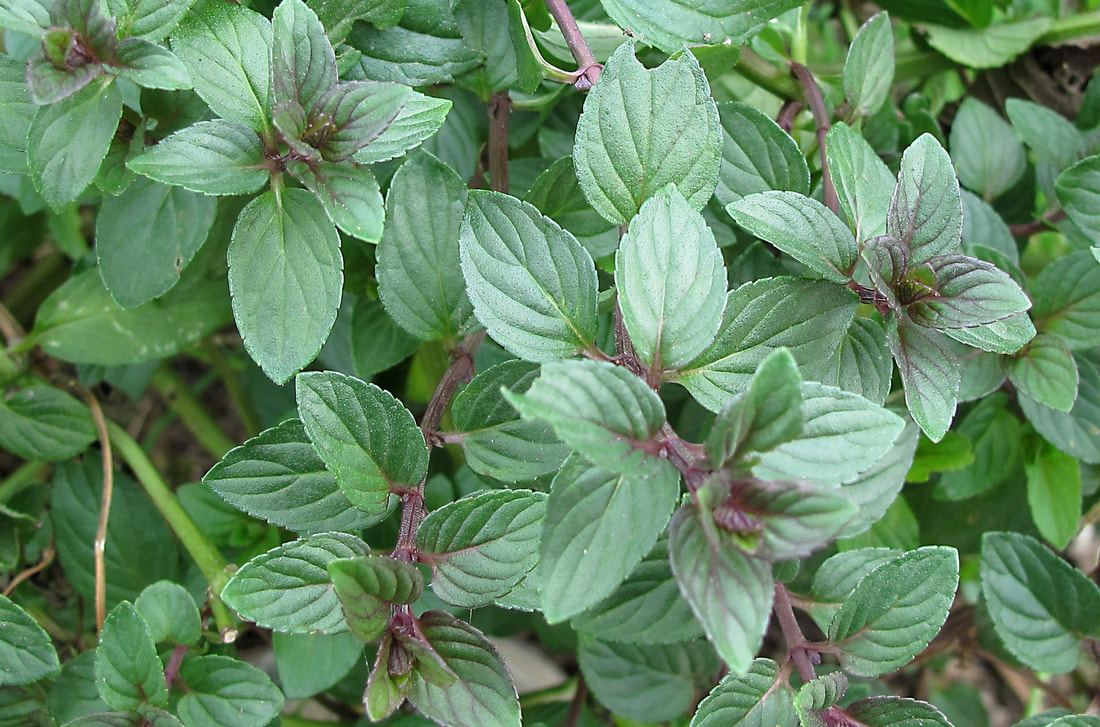
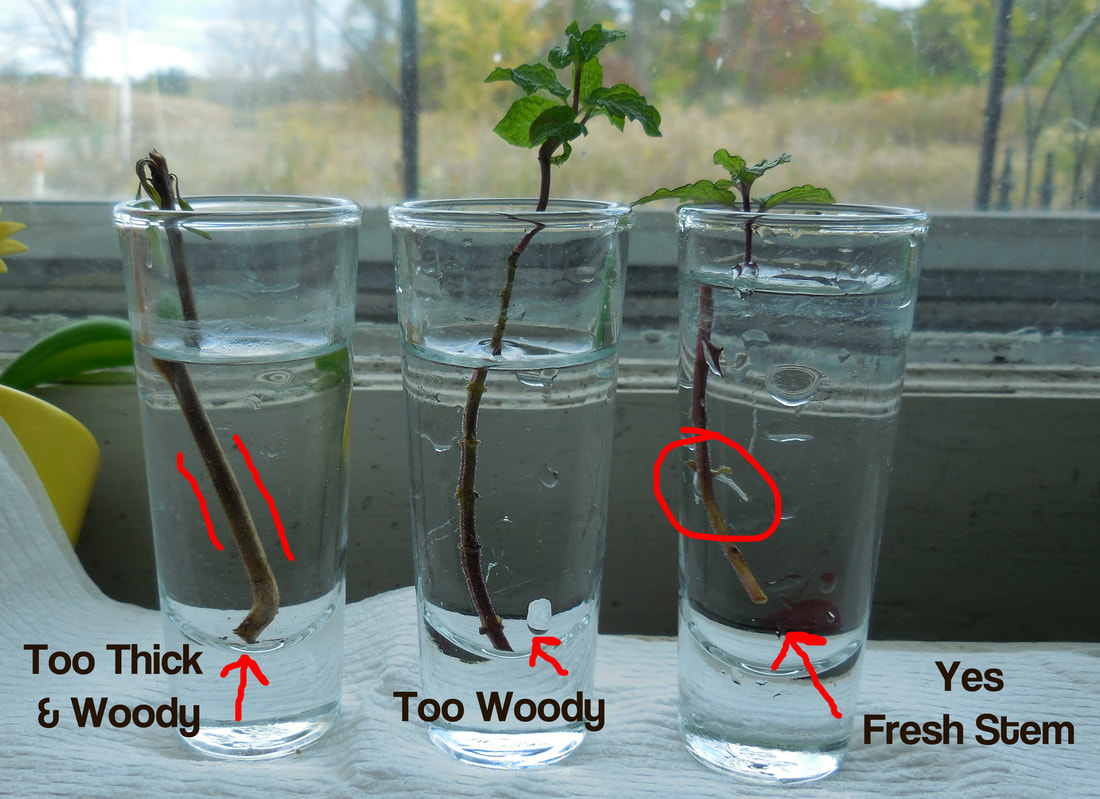
Chocolate Mint (Mentha × piperita) is a hardy, easy to grow herb for both indoor or outdoor gardens & containers. It can tolerate direct sun and a lot of moisture making it great for beginners since one of the most common issues with newbie gardeners is over watering. Besides the fact that this plant is easy to maintain & has a lovely chocolaty mint aroma, it's lush leaves in an ombre of bright green & deep purple provide an interesting back drop for your fairy gardens! Another great aspect of using herbs in your fairy gardens is that, for the most part, you have full control over how tall and broad in diameter your plant will get. The four ways you can control this is by pruning, harvesting, separating clones, & choosing the right container or area in your garden to start creating your little fairy landscape. PruningIf your mint plant is less than a year old it is likely that you will not need to do much pruning unless you want to prevent the plant from blooming. I talk more about this below. After the first year you can cut the plants back several times in a growing season. This would be especially significant if your are wanting to maintain a desired look in your fairy or miniature garden and you need to prevent the foliage from over running your little accessories & landscape structures. To prune during growing season just take a sharp pair of garden shears & snip the stem right above the node (little notch where the leaves grow in at) in a downward diagonal cut. How much you decide to trim is totally up to you but make sure not to cut off more than half of the plant at a time. If the plant is only 8" tall then you would want to avoid trimming more than 3"- 4" of each stem. When growing season has come to an end and it's time for your final harvest cut the entire plant to within an inch or two of the ground. Cutting back your mint before winter is an essential part of preventing fungal or pest related diseases, such as anthracnose, that would otherwise overwinter in the plants. Harvesting your MintSometimes you can luck out and get a light harvest from your mint during the 1st year, but it’s usually best to wait until the following year right before the herb blooms (July to August). You want to be sure that you pay close attention to buds indicating when the plant is about to flower because after it blooms you will definitely have cute lavender flowers, but you will miss out on some of the potency and the leaves will be less fragrant and flavorful. When you do see buds appear, you can simply pinch them off or cut back the tops of the plants to stop them from blooming. Growing Mint in the Garden vs. ContainerMint is an aggressive spreader and can quickly over take your garden. Consider growing mint in a raised garden bed or in a place where it can thrive without interfering with the rest of your landscape. Regularly pruning & harvesting your mint plant will help curb it's aggressive growth. Another really awesome idea for an over abundance of chocolate mint in the garden is to separate the new plants and gift the mint transplants to your family, friends, & neighbors! A baby chocolate mint transplant or cutting can be started in just about any size container but once it begins to grow you will want to find a pot that measures at least 8 inches in diameter and is roughly 10 to 12 inches deep. Avoid shallow containers; mint has a very robust root system and will need plenty of room to fan out. PropagatingPropagating mint is an easy way to turn one mint plant into many. All you need for this is a cutting from a mint plant, garden shears or a sharp knife, a glass, and water. When choosing the stem you will use watch out for the new growth that is sort of towering over the rest of the mint. These lanky sprouts will quickly & easily root to create new mint plants. The new stems that sprout out from the mother plant will eventually turn 'woody'. What you are looking for is a stem that looks fresh. (See the image below) With a sharp blade or garden shears, cut the mint cuttings at a downward angle right BELOW a node (the point on the stem where leaves emerge). Ideally you will want to cut 1/3 of the way down the stem right before the next 'notch'. You will want to keep at least half the stem in tact to promote new growth on the mother plant. Once you have made your cut, you will need to remove the leaves on the bottom nodes. This is done because you will later submerge the cuttings into water for rooting, we do not want the leaves to rot. All that is now left is to fill a glass up with water and submerge the exposed nodes into the glass. For your cuttings to root, place in an area with strong indirect light such as a window sill or shady porch. In just a few days, you will begin to see baby roots sprouting out from these nodes. Normally after 7-10 days, your mint cuttings will grow roots long enough for planting. It's usually best to wait for the roots to reach about 1 -2 inches long before introducing them to their new homes! To begin growing your new mint plants, fill a container with well draining potting soil or a soilless peat-based potting mixture that also contains perlite or vermiculite, poke a hole in the middle, place in your cutting & then water well. Be sure in the beginning to keep the cutting moist while they adapt to growing in the soil. Notice the contrast between the 3 propagated cuttings above. The cutting on the fair right has exactly what we need. It is 4" tall & the bottom of the stem is not woody, it has a reddish beige, almost translucent quality.
|
Author
Tinker Treasures Categories |
Shop Holidays
|
shop By
|
contact
Etsy
eBay |
Learn More
special offers
SHOP |
Welcome to Tinker Treasures! Delivering magic & cuteness to your doorstep shipping within 1-2 business days.
Free shipping on orders over $49.00 & up!*
Free shipping on orders over $49.00 & up!*
Tinker Treasures is a small, privately owned US company based in Stevensville, MI 49127 © COPYRIGHT 2020. ALL RIGHTS RESERVED. Terms of Use


